Create Unique Designs for Leather Patch Hats Custom
- Essential Materials for Your DIY Leather Patch Project
- Creating Your Patch Design
- Transferring the Design to Leather
- Cutting Out the Leather Patch
- Adding Personal Touches to Your Patch (Optional)
- Preparing the Patch for Attachment
- Attaching the Patch to Your Hat
- Protecting Your Finished Patch (Optional)
- Seeking Professional Help
Essential Materials for Your DIY Leather Patch Project
Creating custom leather patches for hats is a rewarding and creative endeavor. To get started, you’ll need to gather some essential materials. Here’s a comprehensive list to ensure you have everything you need:
| Material | Purpose |
|---|---|
| Vegetable-tanned leather | Durable, customizable patches |
| Sharp scissors/knife | Precision cutting |
| Leather dye/paint | Adding color (optional) |
| Leather hole punch/awl | Creating sewing holes |
| Design/stencil | Transferring pattern |
| Pen/pencil | Tracing design |
| Strong adhesive/thread | Attaching patch |
| Hat | Customization base |
| Leather sealant | Protecting patch (optional) |
- Vegetable-tanned leather (2-3 oz thickness) : This type of leather is ideal for patches due to its durability and ease of customization.
- Sharp scissors or precision knife: These tools are crucial for cutting out your design with precision.
- Leather dye or paint (optional) : If you want to add color to your patch, leather dye or paint will be necessary.
- Leather hole punch or awl: These tools are used to create holes for sewing the patch onto the hat.
- Design or stencil: A clear design or stencil will help you transfer your desired pattern onto the leather.
- Pen or pencil for tracing: You’ll need this to trace your design onto the leather.
- Strong adhesive or needle and thread: Depending on your attachment preference, either a strong adhesive or needle and thread will be required.
- Hat for attachment: The hat you plan to customize with your leather patch.
- Sealant for leather (optional) : To protect your finished patch, a leather sealant can be applied.

Creating Your Patch Design
The first step in making your custom leather patch is to decide on a design. This could range from simple shapes like circles or squares to more complex logos or emblems. If you’re not confident in your drawing skills, you can print a design and use it as a stencil. This will ensure that your patch looks professional and meets your expectations.
Transferring the Design to Leather
Once you have your design ready, place your leather on a flat surface. Carefully trace your design onto the leather using a pen or pencil. If you’re using a stencil, secure it onto the leather with tape to prevent it from moving. Make sure your design fits the hat and leaves enough room for attachment. This step is crucial for ensuring that your patch looks good and is easy to attach.
Cutting Out the Leather Patch
With your design traced onto the leather, it’s time to cut it out. Use sharp scissors or a precision knife to carefully cut along the lines of your design. Take your time to ensure that the edges are smooth and clean. If your design has intricate details, a precision knife might be more effective. This step requires patience and a steady hand to achieve the best results.
Adding Personal Touches to Your Patch (Optional)
This is where you can let your creativity shine. If you want to add color to your patch, use leather dye or paint. You can also emboss or engrave the leather to add texture and depth. Make sure to let any dye or paint dry completely before moving on to the next step. These personal touches can make your patch truly unique and special.
Preparing the Patch for Attachment
Before attaching your patch to the hat, you need to prepare it. If you plan to sew the patch, use a leather hole punch or awl to create holes around the edges of the patch. This will make it easier to sew and ensure that the patch is securely attached. If you plan to use adhesive, make sure the back of the patch is clean and ready for glue application.
Attaching the Patch to Your Hat
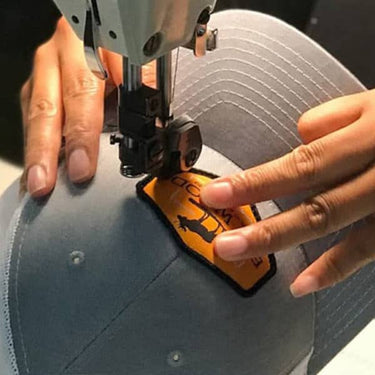
There are two main methods for attaching your patch to the hat: sewing and gluing.
Sewing
If you choose to sew your patch, use a thick, durable thread and a needle. Carefully stitch your patch onto the hat, making sure it’s secure. This method is more time-consuming but provides a strong and long-lasting attachment.
Gluing
If you prefer to glue your patch, apply a strong adhesive to the back of the patch. Press it firmly onto the hat in the desired position and allow it to dry according to the glue manufacturer’s instructions. This method is quicker and easier but may not be as durable as sewing.
Protecting Your Finished Patch (Optional)
To ensure your patch lasts and withstands the elements, consider applying a sealant designed for leather. This will protect your design and keep it looking sharp. A sealant can also add a layer of protection against wear and tear, making your patch more durable.
Seeking Professional Help
If you want to achieve professional-grade patches with intricate designs or need a large quantity, consider seeking help from experts. Top Custom Hats offers a wide range of customization options and a team of professionals ready to bring your vision to life. Contact them online to see how they can elevate your custom patch projects.
By following these steps and using the right materials, you can create stunning custom leather patches for your hats. Whether you’re making them for personal use, gifts, or starting a small business, these patches will add a unique and personal touch to any hat.


