
Revolutionize Hat Design with Custom Leather Patches
Introduction

The versatility of CO2 lasers has revolutionized the custom hat design industry. These lasers are not only precise but also incredibly adaptable, making them ideal for creating intricate designs on various materials, including leather. Recently, a client approached me with a request for personalized leather patches to be sewn onto hats. This project highlighted the unique capabilities of CO2 lasers in producing high-quality, custom leather patches hats. Let’s delve into the process and materials required to achieve the best results.
| Benefit | Description |
|---|---|
| Precision | Accurate cuts and engravings |
| Versatility | Works on various materials, including leather |
| Efficiency | Fast processing, minimal waste |
| Quality | High-quality, professional results |
| Customization | Personalized designs, intricate patterns |
Essential Materials
| Material/Tool | Purpose |
|---|---|
| Leather | Durability, premium finish |
| Art Knife | Precise cutting, trimming |
| 24” Masking Tape | Protects leather during laser cutting |
| Self-Healing Cutting Mat | Safe, stable cutting surface |
| Scraper | Removes residue, debris |
| 60-watt Epilog Fusion Edge Laser | Cutting, engraving leather patches |
To create custom leather patches, you’ll need the following materials:
- Leather: Choose high-quality leather for durability and a premium finish.
- Art Knife: Essential for precise cutting and trimming.
- 24" Masking Tape: Low to medium tack tape to protect the leather during laser cutting.
- Self-Healing Cutting Mat: Provides a safe and stable surface for cutting.
- Scraper: Useful for removing any residue or debris from the leather surface.

Laser Cutting and Engraving Tools
For this project, we used a 60-watt Epilog Fusion Edge laser. Here are the specific settings we employed:
- Raster Engraving: 500DPI, 80% speed, 20% power
- Vector Cutting: 20% speed, 90% power, 60% frequency
These settings ensure precise and clean cuts, as well as detailed engravings on the leather patches.
Step-by-Step Guide to Crafting Leather Patches
| Step | Action | Laser Settings |
|---|---|---|
| Preparing Artwork | Design, nest, separate layers | N/A |
| Masking the Leather | Apply masking tape | N/A |
| Cutting the Leather | Cut patches, remove tape | 20% speed, 90% power, 60% frequency |
| Engraving the Leather | Position patches, start engraving | 500DPI, 80% speed, 20% power |
| Final Touches | Apply leather finish (optional), sew patches | N/A |
Step 1: Preparing Your Artwork
The first step in creating custom leather patches is to prepare your artwork. Design your artwork according to the shape and size of the patch. To maximize material usage, nest the artwork efficiently. This involves arranging the designs closely together to minimize waste. Additionally, separate the layers for cutting and engraving. This separation ensures that the laser cutter knows which parts of the design to cut and which parts to engrave.
Step 2: Masking the Leather
Before cutting, apply a low to medium tack masking tape to the leather. This step is crucial as it helps to keep the edges of the leather clean during the laser cutting process. The masking tape acts as a protective layer, preventing the laser from scorching the surface of the leather. Ensure that the tape is applied smoothly and without any wrinkles to avoid any imperfections in the final product.
Step 3: Cutting the Leather Patches
With the leather masked, proceed to cut the patches using the laser cutter. It’s important to keep the masking tape on during this step to protect the leather. Once the patches are cut, carefully remove the masking tape. This will reveal clean and precise edges, ready for the next step.
Step 4: Engraving the Leather Patches
Before engraving, ensure that each leather patch lies flat on the laser bed. This is essential for achieving consistent and accurate engravings. Once the patches are properly positioned, start the engraving process. The laser will etch the design onto the leather, creating detailed and intricate patterns. The settings mentioned earlier (500DPI, 80% speed, 20% power) will help achieve the best results.
Step 5: Final Touches and Enjoyment
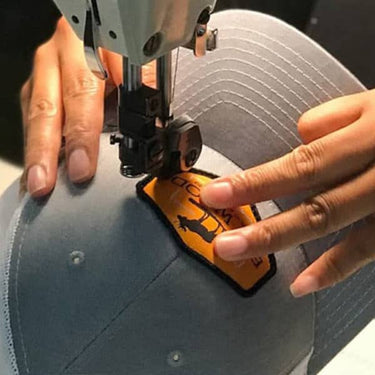
After the engraving is complete, your custom leather patches are ready! At this stage, you can choose to apply a leather finish for a polished look. This step is optional but can enhance the appearance and durability of the patches. Once finished, the patches can be sewn onto hats or other items, adding a personalized and unique touch.
In conclusion, creating custom leather patches with a CO2 laser involves a series of precise steps and the right materials. By following this guide, you can achieve professional-quality results that meet your clients’ needs and expectations. Whether for personal use or as a business offering, these custom patches are sure to impress.