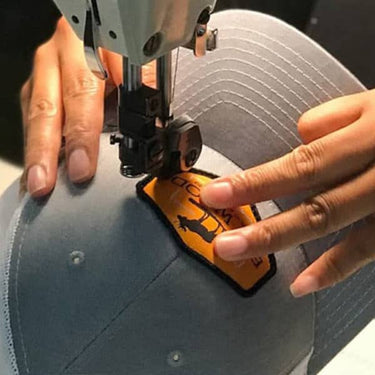
The Secret to Custom Hat with 3D Embroidery Patches
The Rise of 3D Embroidered Patches
In recent years, 3D embroidered patches have become a popular method for customizing hats. These patches add a unique, dimensional look that stands out, making them highly sought after in the fashion and promotional industries. One of the key features that make these patches so appealing is the use of low melt backing adhesive, which allows for easy and secure application. This adhesive ensures that the patches stay in place, even after multiple uses and washes.

Detailed Application Guide
| Step | Action | Details |
|---|---|---|
| Step 1: Preparation | Position hat in IQ 360 Hat Heat Press | Pull out sweatband |
| Step 2: Setup | Set heat press temperature and pressure | Top: 290-300°F, Bottom: 315-320°F, Pressure: 60-80 psi |
| Step 3: Placement | Place and align 3D embroidered patch | Use Thermal Tape |
| Step 4: Pressing | Cover with FlexStyle® silicone pad | Press for 25-30 seconds |
| Step 5: Finalizing | Cool and remove Thermal Tape | Reveal custom hat |
Step 1: Preparing the Hat
To start, you need to correctly position your hat in the IQ 360 Hat Heat Press. This step is crucial for ensuring that the patch adheres properly. Begin by pulling out the sweatband from the hat. This will help you position the hat more securely in the press. Once the sweatband is out, place the hat into the heat press and pull down the lever to secure it. This ensures that the hat remains in place during the application process.
Step 2: Setting Up the Heat Press
Next, you need to set up the heat press with the correct temperature and pressure settings. Adjust the top heat to between 290°F and 300°F, and the bottom heat to between 315°F and 320°F. These temperature settings are optimal for activating the low melt backing adhesive on the 3D embroidered patches. Additionally, set the pressure to 60-80 psi. This level of pressure ensures that the patch adheres firmly to the hat.
Step 3: Placing the Patch
Once the heat press is set up, it’s time to place your 3D embroidered patch on the hat. Position the patch on the desired location, making sure it is aligned correctly. To prevent the patch from moving during the pressing process, use Thermal Tape to secure it in place. This tape is heat-resistant and will keep the patch steady, ensuring a precise application.
Step 4: Pressing the Patch
With the patch securely in place, cover the design with a FlexStyle® silicone pad. This pad protects the patch from direct heat and ensures even pressure distribution. Press the hat with the patch for 25-30 seconds. This duration is sufficient to activate the adhesive and secure the patch to the hat. The silicone pad also helps in achieving a smooth finish, enhancing the overall look of the custom hat.
Step 5: Finalizing the Custom Hat
After pressing, carefully remove the hat from the heat press and let it cool. Cooling is an essential step as it allows the adhesive to set properly. Once the hat has cooled down, remove the Thermal Tape to reveal your custom hat with a dimensional 3D embroidered patch. The result is a personalized hat that stands out with its unique design and professional finish.

Important Considerations
When working with 3D embroidered patches, it’s important to test the heat seal parameters on a sample garment before applying them to your final product. This ensures that you achieve the best results without damaging the hat or the patch. Additionally, for more tips and detailed guides, you can follow us on social media or visit our website.
| Feature | Description |
|---|---|
| Dimensional Look | Unique, stands out |
| Low Melt Backing | Easy, secure application |
| Durability | Stays in place after multiple uses/washes |
| Versatility | Fashion and promotional industries |
By following these steps, you can easily create custom hats with 3D embroidered patches that are both stylish and durable. Whether you’re making hats for a sports team, a promotional event, or personal use, these patches add a unique touch that sets your hats apart.


