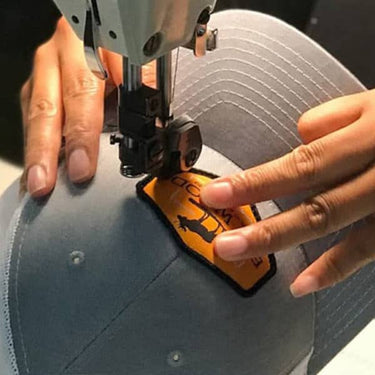
Master the Art of Customizing Hats with Patches
Essential Tools for Customizing Your Hat
To sew patches on hats, you need a few essential tools. These tools will ensure that your patch is securely attached and looks professional.
- Hat: Choose a hat that you want to customize. It could be a baseball cap, a beanie, or any other type of hat.
- Custom patch: Select a patch that reflects your style or message. Custom patches can be found online or at craft stores.
- Matching thread: Use thread that matches the color of your patch to make the stitches less visible.
- Size 10 needle: A size 10 needle is ideal for sewing patches onto hats because it is sturdy and can handle thicker materials.
- Scissors: Sharp scissors are necessary for cutting thread and trimming any excess material.
- Glue: Fabric glue helps to temporarily hold the patch in place while you sew.
- Thimble: A thimble protects your finger when pushing the needle through thick fabric.
Machine Sewing Technique for Patches
Step 1: Attach the Patch
To begin, you need to secure the patch in place. You can use pins, glue, or even tape to hold it steady. This step is crucial to ensure the patch doesn’t move while you’re sewing. Think of it as setting the stage for a flawless performance.
Step 2: Thread the Sewing Machine Needle
Next, thread your sewing machine needle. Choose a thread that matches the color of your patch for a seamless look. Adjust the stitch length on your machine to suit the fabric and patch material. This will help in achieving a neat and professional finish.
Step 3: Sew Around the Patch
Now, it’s time to sew. Start by sewing a straight stitch around the perimeter of the patch. This initial stitch will anchor the patch securely. After completing the straight stitch, switch to a zigzag stitch. The zigzag stitch not only adds extra security but also gives a decorative touch.
Step 4: Backstitch for Extra Security
Don’t forget to backstitch at the beginning and end of your sewing. This step is essential to prevent the stitches from unraveling. Backstitching reinforces the attachment, ensuring that your patch stays put even after multiple washes.
Step 5: Trim and Tie
Once you’ve finished sewing, trim any excess thread. Make sure to tie a knot on the inside of the hat. This knot will keep the thread from coming loose and will be hidden from view, maintaining the hat’s aesthetic appeal.
Step 6: Admire Your Work
Congratulations! Your patch is now securely attached. Take a moment to admire your handiwork. You’ve successfully customized your hat, making it a unique piece that reflects your personal style.
Hand Sewing Method for Attaching Patches
Hand sewing is a traditional and reliable method for attaching patches to hats. Follow these steps to customize your hat with a patch:
- Place the patch on the hat: Position the patch on the hat where you want it to be. It’s a good idea to wear the hat and look in the mirror to ensure the placement is perfect.
- Secure the patch with glue: Apply a small amount of fabric glue to the back of the patch and press it onto the hat. This will keep the patch in place while you sew.
- Thread your needle: Cut a piece of thread about 24 inches long and thread it through the size 10 needle. Tie a knot at the end of the thread to prevent it from slipping through the fabric.
- Use a thimble and turn the hat inside out: Put a thimble on your dominant hand’s middle finger to protect it while sewing. Turn the hat inside out to make it easier to sew from the inside.
- Carefully sew around the patch: Start sewing from the inside of the hat, pushing the needle through the fabric and the patch. Use small, even stitches to sew around the entire border of the patch. Take your time to ensure the stitches are neat and secure.
- Trim the thread and tie a knot inside the hat: Once you have sewn around the entire patch, trim the excess thread with scissors. Tie a knot on the inside of the hat to secure the thread and prevent it from unraveling.
- Admire your personalized hat: Turn the hat right side out and admire your work. You now have a customized hat with a securely attached patch that reflects your unique style.
By following these steps, you can easily sew * *patches on hats and create personalized accessories that stand out. Whether you’re adding a logo, a favorite character, or a meaningful symbol, hand sewing allows you to make your hat truly one-of-a-kind.
Adding patches to your accessories is a fantastic way to showcase your personality. It allows you to transform a plain hat into a unique piece that tells a story. So why wait? Start customizing your hat today and let your creativity shine!
FAQ
Is It Possible to Sew Patches on a Hat?
Absolutely! With the right tools and a bit of patience, you can easily sew patches on a hat. Whether you choose to sew by hand or use a sewing machine, the process is straightforward. The key is to take your time and ensure each step is done correctly.
How Durable Are Sewn Patches?
Sewn patches are incredibly durable. When attached with enough thread and proper stitching techniques, they can withstand regular wear and tear. The combination of straight and zigzag stitches provides a strong hold, ensuring the patch remains intact for a long time.


